- MAP MODELS TEXTURES LEVELS PHOTOS ARTWORK MAP MODELS TEXTURES LEVELS ARTWORK MAP MODELS TEXTURES LEVELS   - MAP MODELS TEXTURES LEVELS
TUTORIALS  
-
-
HOME
-
-
MODELS
-
TEXTURES
-
LEVELS
-
ARTWORK
-
SHADERS
-
TUTORIAL
-
FILES
-
-
-
-
-
TUTORIALS
-
-
-
-
-
-
HOME
-
-
-
 
-
-
- - - - -
-
-
-
-
-
-
-
-
-
-
-
-
-
 
UVW MAPPING PART2

uvw wrapping part2

imp_controls

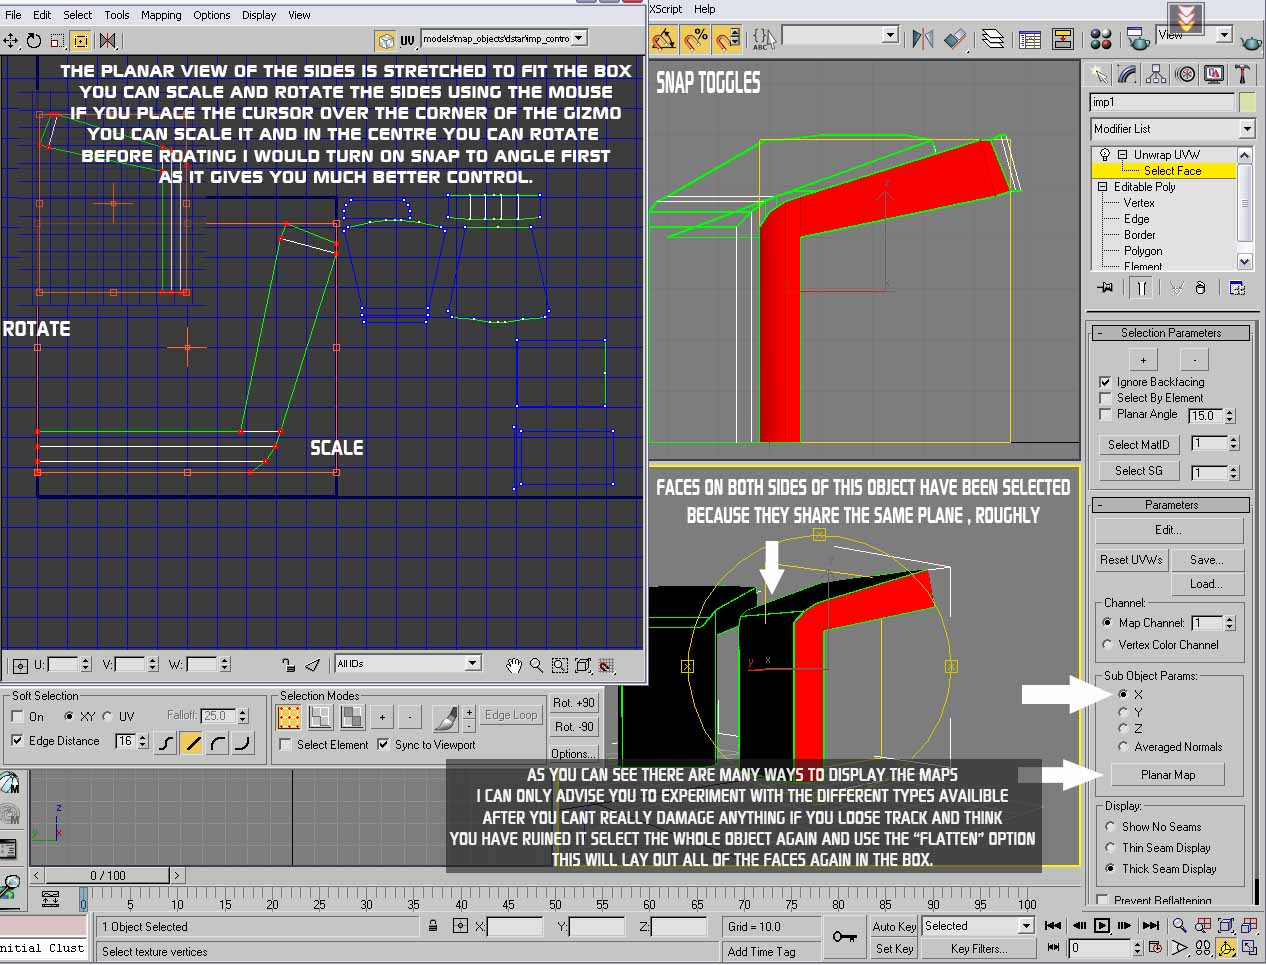
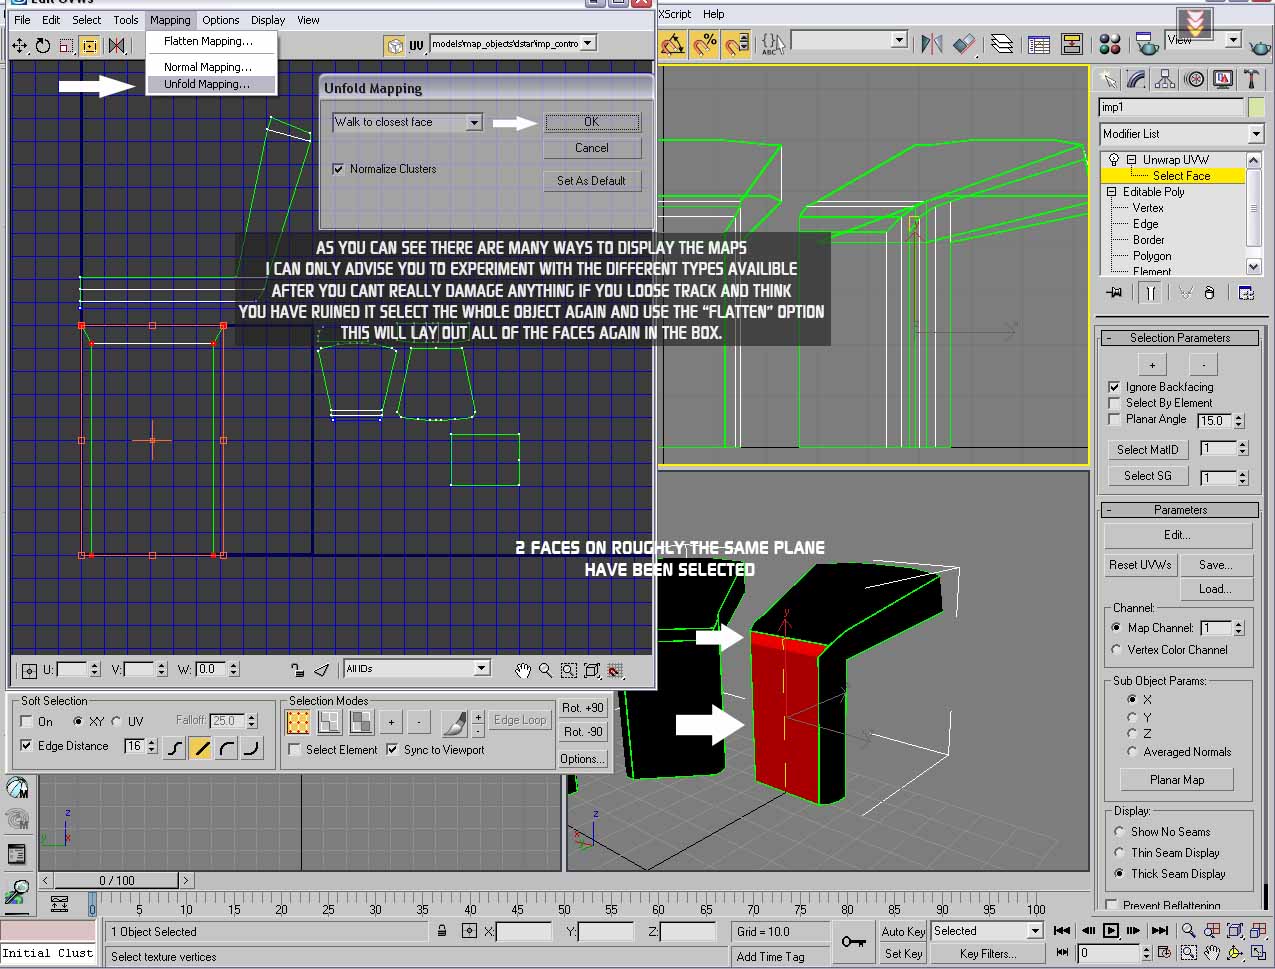
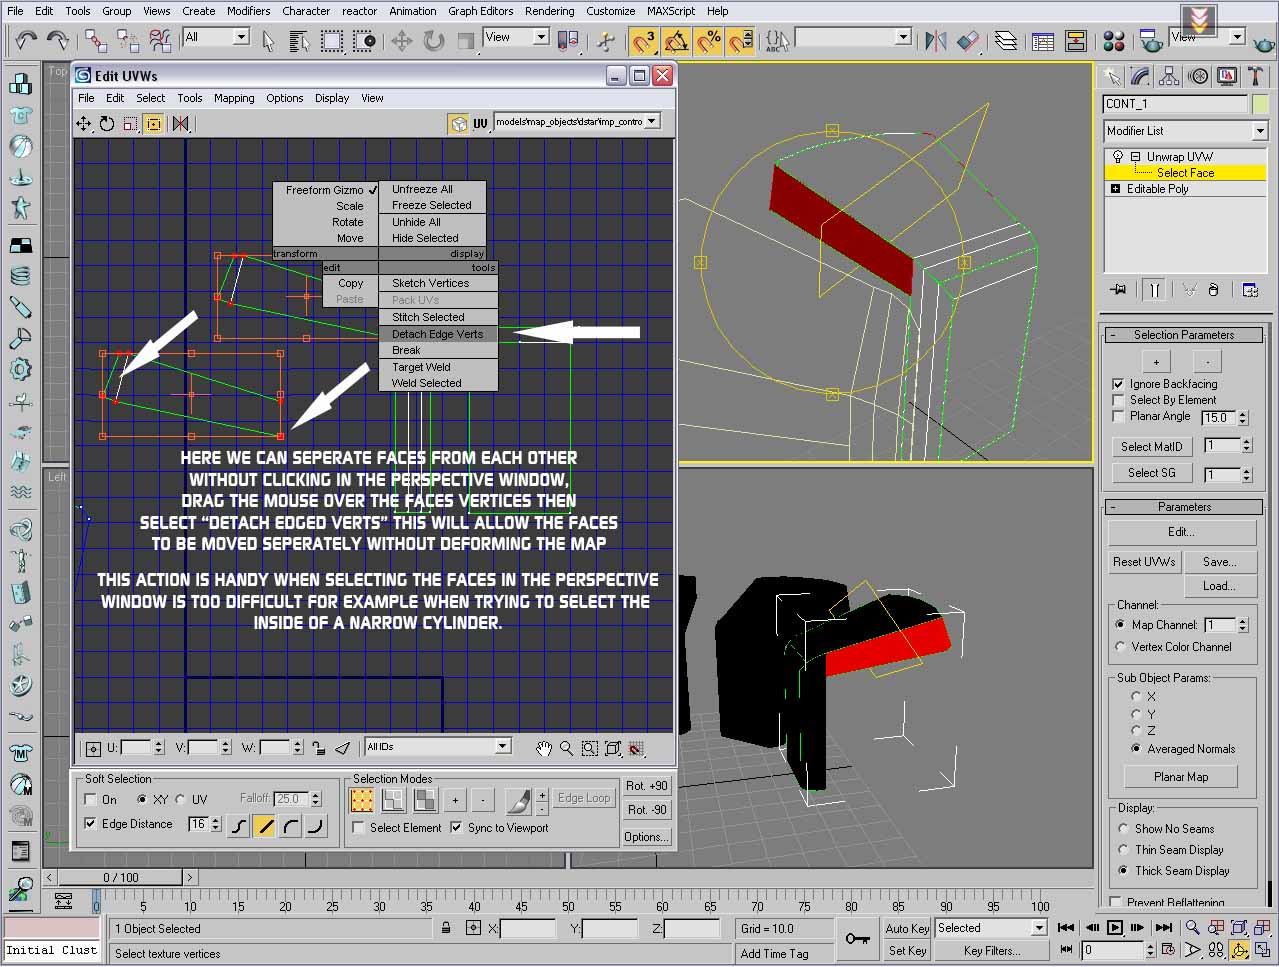
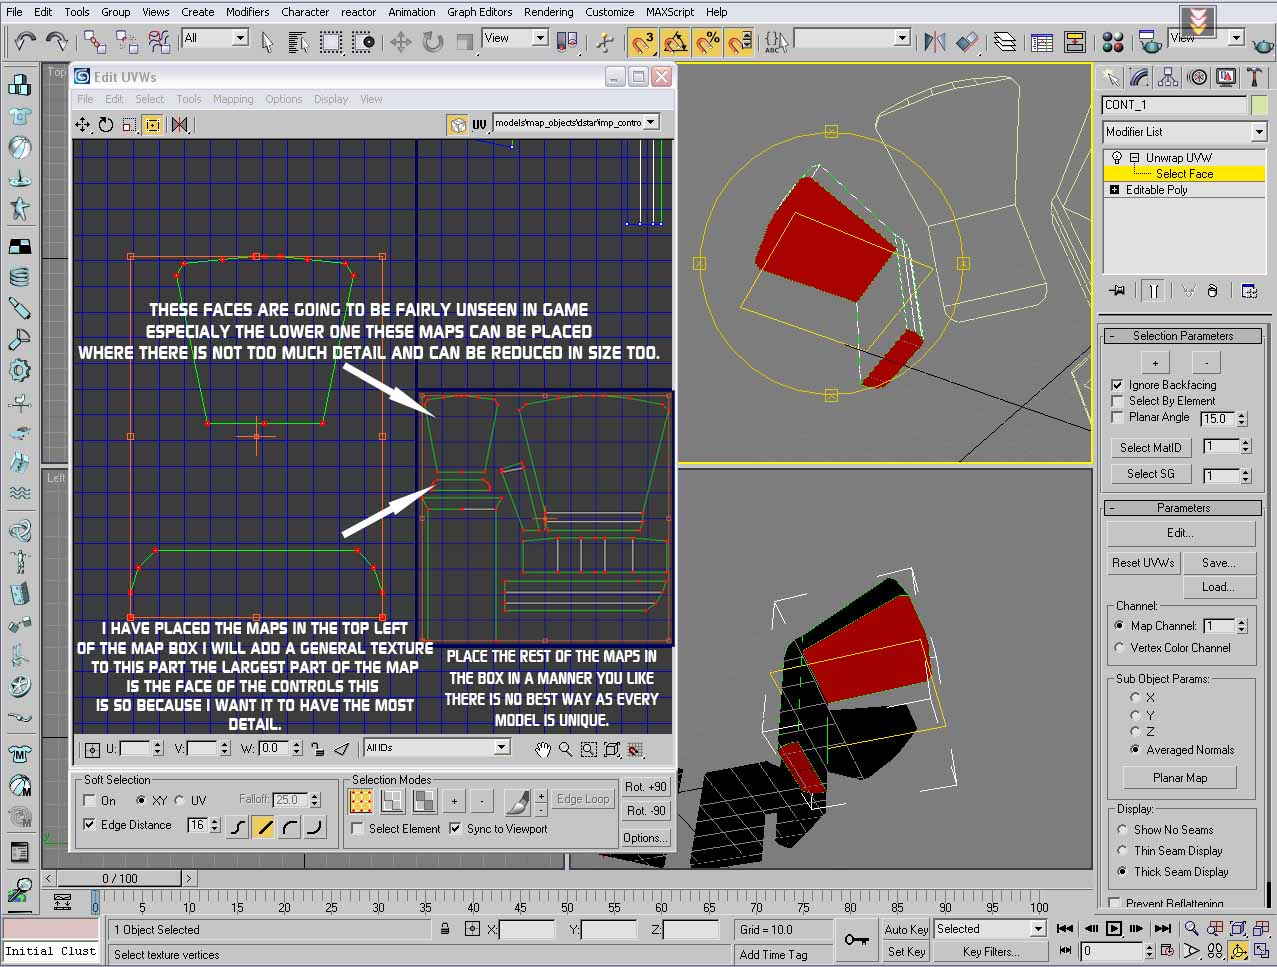
I find it handy to place selected objects outside the box, as it can get a bit crowded in there, i usually place flattened faces in groups out here untill all of the maps have been sorted out, you will have to experiment here and you will find that there are many ways to lay out or flatten the maps, but i recomend trying some out until you get to know them as some are great time savers, especialy the unfold map option.(best for regular shapes like boxes)

click the image for more text.

uvw2

uvw3

You can choose between "flatten", "unfold" and "normal mapping" , but in the end it comes down to personal preference.


It is possible to rotate the faces in the edit window,at each corner of the freeform gizmo(see above)there are points, when you place the mouse curser over any one of them the point becomes active and manipulation is possible.

When we see faces that are going to look similar when the model is finished we can overlap them in the edit window so they are occupying the same space in the texture.


Click the image on the right to see more about this.


uvw4

uvw5

Here i am showing how to seperate faces selected in the edit window, everyone has a preferred method of selecting faces some use the perspective window others the edit window or a combination of both, if you have selected too many faces and you want to separate the faces you want from those that you do then when the faces are selected right click over the gizmo and choose "Detach edged verts" this prevents the dragging of unwanted faces, it is possible to "stitch" verts together also. Click image for more.

uvw6

With all the faces layed out and scaled to our liking we can then place them all back inside the box, the image here shows what i do with faces that wont be seen or hardly seen in game, i tend to scale them down for a start and will place them away from places of detail, when i make the texture for this model i will asign a general colour, nothing too striking, as we want the detail and focus of the model to dominate, game modeling is not subtle.

When the object is mapped to your liking save the map in the edit window and give it name relevant to the model, then select each of the other objects and apply the uvw unwrap modifier just like the first model.

Make a texture or in this case 2 or 3 for variation of the consoles,

When the model is finished its ready to export to the level editor, in this case GTK Radiant, i will cover this in the next tutorial. HERE

See this page on saving and loading uvw map files for multiple objects.


CLICK HERE
TUTORIAL
HOME
PREVIOUS
PAGE
HOME
-
-
-
-
PART2
-
TUTORIAL 2
-
-
-
LINKS
-
-
-
-
-
-
-
WORKS
IN
PROGRESS
-
-
-
-
-
-
HOME
-
-
-
 
-
-
- - - - -
-
-
-
-
-
-
-
-
-
-
-
-
-