- MAP MODELS TEXTURES LEVELS PHOTOS ARTWORK MAP MODELS TEXTURES LEVELS ARTWORK MAP MODELS TEXTURES LEVELS   - MAP MODELS TEXTURES LEVELS
TUTORIALS  
-
-
HOME
-
-
MODELS
-
TEXTURES
-
LEVELS
-
ARTWORK
-
SHADERS
-
TUTORIAL
-
FILES
-
-
-
-
-
TUTORIALS
-
-
-
-
-
-
HOME
-
-
-
 
-
-
- - - - -
-
-
-
-
-
-
-
-
-
-
-
-
-
 
PLACING A CAMERA IN JEDI ACADEMY
This tutorial is very useful if you want to add more to you SP levels.

First you need to place the "misc_camera" where you want it, at this point the "misc_camera" is just a blue box don't worry if you dint actually see a camera, Name it "sec_cam_top".

This tutorial should be suitable for anyone who use the "entity window" "N" on the keyboard.

You may loose your way now and then but keep at it and it will work, pay close attention to the path corner naming and linking as this is where you are likely to slip up.
You will need to create a "func_train" this is actually what moves along the path the camera just targets it.

You will need make the func train about the same size as the camera entity and texture it with the "nodraw" texture.

MISC_CAMERA_01

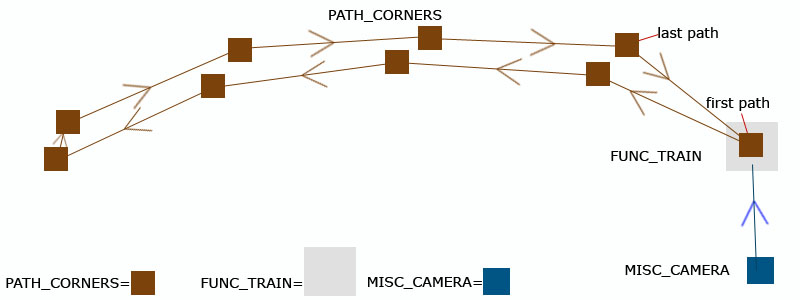
Now create 9 "path_corners", and name them sequentially for example "sec_cam_path_01", "sec_cam_path_02" etc.

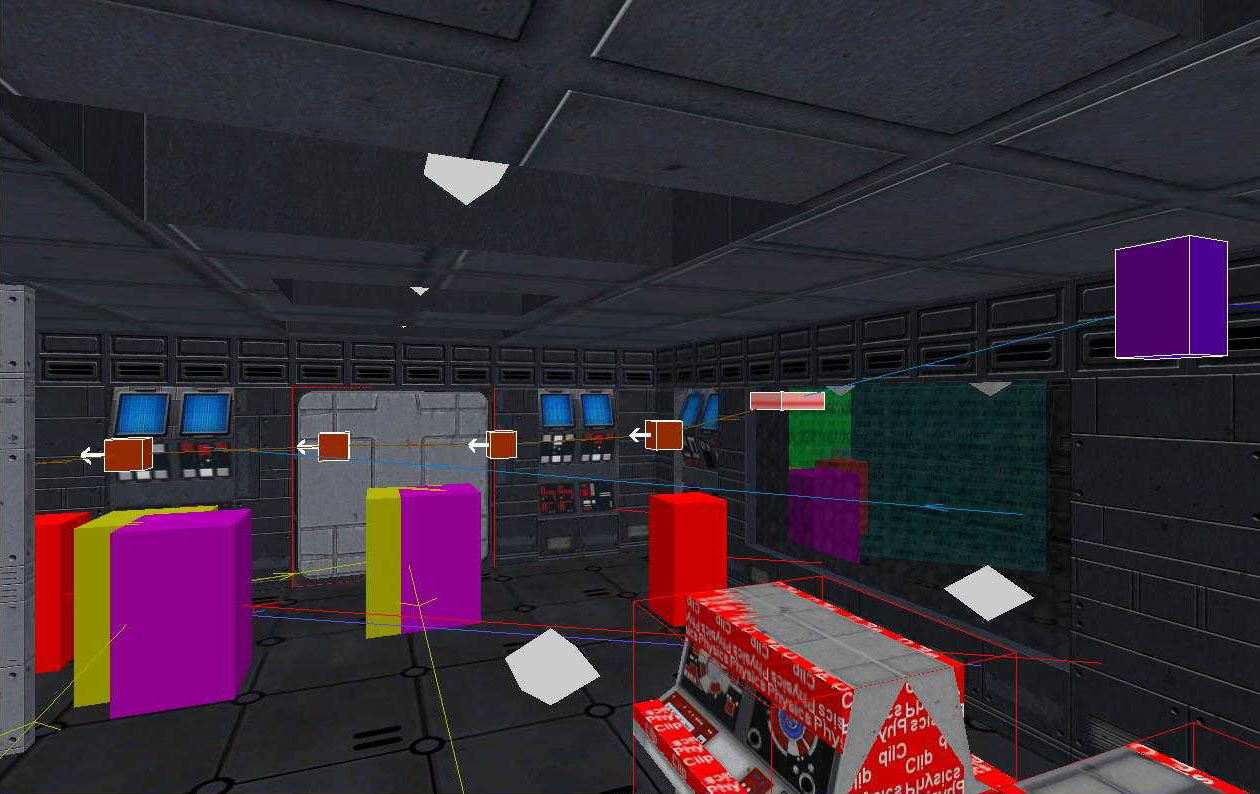
Now target them as you see them in the image above with the first path being the one within the func train. (the func train is just placed overlaping the first path dont worry if they are touching it wont affect anything)

Remember to target the last path to the first path creating a loop.

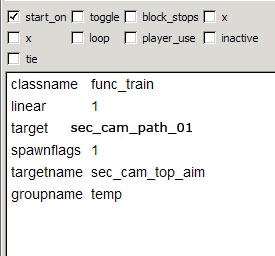
Now name the func train "sec_path_anim" and target it to the first "path_corner" which should be "sec_cam_path_01".


The func train should have the following values in the entity window
Func_train_settings

If you look at the image above you will see there are path_corners above each other, this just for illustatitive purposes.

After you have named and linked the paths place the paths that are above each other so they are "on top" of each other by that i mean are occupying the same space, see the image below to see how they should look when you are finshed with them.

Sec_cam_screenshot_from_gtk

Now you have almost got it sorted all you need to do is place a trigger_multiple in your level where you want the player to view what the camera sees.

Place a brush and give it a monitor texture so the player has something to promt investigation.

Give the trigger the following settings:

sec_cam_shot_trigger


Note the angle key opposite is in relation to the direction MY trigger is facing, your trigger may need a different value.

Also the target is the targetname of the "misc_camera" you have just set up.
sec_cam_shot_trigger_settings2
TUTORIAL
HOME
HOME
-
-
-
-
PART2
-
TUTORIAL 2
-
-
-
LINKS
-
-
-
-
-
-
-
WORKS
IN
PROGRESS
-
-
-
-
-
-
HOME
-
-
-
 
-
-
- - - - -
-
-
-
-
-
-
-
-
-
-
-
-
-